Showing posts with label Millinery Trim. Show all posts

Friday, August 8, 2014

Deadline for Millinery Competition Drawing Near; Burning Millinery Feathers; Preparing for a Competition I'll be Entering

By this time many of you are either excited about the Hatstruck millinery competition here, or you will be glad when it's over so that I can get on with discussing hat making.  Well I'm in both camps.  This post is written for three purposes:  (1) a reminder that the competition will be ending in a few days; (2) to share a few tips on burning feathers to use as millinery trim or for other purposes; and (3) to discuss what I will be doing for the next couple of weeks as I prepare for the competition I will be entering into--the Mad Hatters Society competition on FaceBook.
 
The Hatstruck Millinery Competition--Elegant, Fun Couture Hats, 2014

I have gotten messages from some of you stating that you will be entering the contest in the last hour.  I understand that because that is exactly what I do when I enter contests.  However, since one of the requirements for entering this contest is that you be a follower of this blog (you may unfollow it after the competition is over), it is important that you complete this process so that I may approve your entry for judging.  Please, I do not want to disqualify anyone.  There will be no exceptions.  Also, I need to be able to identify you if you are under a screen name other than your given name, so please make sure that you let me know who you are.  For competition rules and regulations, please visit the two linked 
locations in this sentence.

Please Note!!!

In order to obtain a higher score in the competition, don't forget to show the inside of your hat, etc; remember that the competition has a theme; review the winning categories to get an idea of what is needed to do well in the contest (presentation, theme appropriateness, workmanship, etc.).  Good luck!

The Competition that I'll be Entering

Yes I'm entering another competition.  You've heard it before--competitions force me to make hats; plus, they force me to design and make something other than what I would normally make.  Although I will be (or plan to) make three hats, I will only concentrate on one hat, the other two will be ordinary, boring hats.  So, for my extraordinary (in my head) hat I've gathered beads, silks, and velvet, and burned some feathers.  Many times I don't even use the materials I purchase for a competition, but this time I will, I must; at least a tenth of them.  I really should start selling some of these hats to recuperate some of my money.

Anyway, the theme for the Hatters competition has something to do with a mad hatter. So I'm using one of my candle holders--shown in the image above--to block my top hat form over.  Usually I pin and nail into my bowls, candle holders, etc. (not my hat blocks!), if I can, but this time I will not be doing so because I like the holder and I don't want to destroy it.

Well, I've draped some bias strips onto the holder using my favorite millinery material, buckram.  Buckram is perfect for this shape because it sticks to itself, therefore I don't have to secure the buckram to my alternative, makeshift hat block.  The resulting form does not have to be perfect because it will be mulled (padded/covered) with another material to smooth it out in order to ready the form for its final outer cover material.  So, why didn't I create a perfect flat pattern?  Because I'm lazy, and when you know how to, you don't have to....

Anyway, the form is drying now, and when it has dried I will remove it from the candle holder, wire it, and mull it, etc.  I'll share those images with you as I proceed.  In the background of the image you'll see the feathers I burned, plus a few other feathers I may use on my EXTRAORDINARY design.  Because it's a top hat and it has been around for at least a couple of centuries, worn by men and women, I don't see how I could improve very much over many of the beautiful ones I've seen over the years.  Plus I figured since I'm always writing about couture hats, I should at least make one every once in a while.   I must also note that I didn't have to make a top hat to satisfy the theme for the competition; I could have gone another route--not so literal, abstract.  I just wanted to make a top hat.  Speaking of feathers, I thought I would share a few tips on how I improved the appearance and texture of my burnt feathers.  I should mention here that, although I have a sketch and a general idea of what I will be making, I can't guarantee you that any of these feathers or jewels will be on the hat,; we'll see.

A Few Tips on Burning Feathers for Millinery Trim 

Okay, by now some of you are familiar with the term feather burning.  Simply stated, it is the removal of portions of the feather (lesser barbs) with a caustic substance; in the case of feathers burning, the caustic substance is bleach. Today the word Clorox and bleach have become synonymous, no matter its manufacturer.  Just a little note here, I pin many resources on my Pinterest board because there is more room there than it is here on the blog.  While you are doing your millinery research, feel free to visit it and to also follow me, as I update the millinery boards quite often.  Above is an image of the anatomy of a feather.  Just by viewing it you may get an idea of the portion of the feather that will burned away (I'll call the areas "the lesser barbs"--the more fragile parts of the feather).


On one of my Pinterest boards, "How Other Milliners and Hatters Do It," there is a pin on burning feather; more specifically, the direct link is here.  The tutorial came from a very good costuming site, Costumes by Lynn McMasters.  So basically I followed those instructions, but I went a little further because my feathers didn't look as professional.  After I burned my feathers, the remaining lesser barbs were stiff and some were stuck together.  So I thought that I didn't rinse them well enough.  Then I thought, after a few experiments, that not rinsing enough was not the issue.  So I hurt my little brain (thinking) trying to figure out the problem.  It came to me that when we dye or bleach hair (or bleach clothing for the purpose of removing color), we have to neutralize the bleach--stop the process of eating away at the material (causing the lesser barbs to melt together).  So in order to stop the process, I had to find out what would neutralize bleach, soda--from my research on the Web.  So for me this worked better.  After burning, rinsing, drying, steaming, and coming, the results is shown above.  The feathers at the top of the image have not been neutralized, while the feathers at the bottom have been neutralized.  Also, I found that the regular bleach is better because the non-splash type bleach is harder to rinse from the feathers because of the bleach's thickness.  Although the feathers above have a medium burn, you can leave them in the bleach longer to obtain more burn--a more wiry look.

Happy bleaching everyone!


Thursday, October 6, 2011

(1) Class Reminder: Couture Millinery Fascinator Class, October 15th; (2) Learning from the Past: My First Bird-of-Paradise


Couture Millinery Fascinator Class Less Than Two Weeks Away!

First, I would like to thank those of you that dug your way through my wordy, confusing class registration instructions to pay and register for class.   I'll do better next time.  For those of you still having problems figuring out how to pay/register, here is the short and skinny.  If you would like to pay through PayPal, just email me at lduncan@hatstruck.com.  In the email, provide me with the email address associated to your PayPal account, and I will send you an invoice for payment.  If you are sending a check, email me for my address.  The check must clear before class begins.  You also have the option of paying by money order before the day of class start.  There are a few seats left; first come, first served.

Learning from the Past:  My First Bird-of-Paradise

I  know, you think I've taken leave of my senses, especially when I tell you that I've had an overwhelming urge to travel to downtown Los Angeles (California Millinery) to purchase these vintage broken, faded birds.  Well, some of you would think that I was "touched," but some of you would identify with this urge.  It is the urge to learn something new, the urge to grow my craft, the urge to improve.  I've felt for some time that I have been driving on a four-lane highway, with all of the cars horizontally lined up.  I've been feeling the urge to move forward lately; this is a good thing.  I invite these feelings.  

Although I give credit to my instructors and my millinery library for some of my growth, I have to give myself credit for having that itch that moves me forward.  How else would my skills have grown so much over the years.  I say these things to encourage you to move beyond that which has been taught you and that which will be taught you. These vintage birds are also my millinery instructors.  All of them have been made with different supporting materials.  All of them look different.  There is no one way of doing anything.  If you subscribe to this notion, your growth will be stunted.  

I love visiting California Millinery because there I can purchase and/or study artifacts that will never again be made with such skill.   I have heard some call these artifacts junk.  What a shame....  After all, this junk taught me how to make my first bird-of-paradise.


Fascinator Construction:  Buckram frame covered with black suede, and sprinkled with large vintage amber-colored rhinestones.

Wednesday, August 24, 2011

Foundations for My Cocktail/Fascinator Hats: Part II, Including Blocking Suede and Other Millinery Materials

I have a nasty habit of giving things away.  I picked this up from my grandparents, two extremely generous people.  I guess this is a good thing, after all I've gotten back more than I've ever given away.  You see, back in February of 2010, I brought you Foundations for My Cocktail/Fascinator Hats and promised, I think, to post a followup showing how to put the lining in the hat.  Well, someone wanted the hat even before I finished it, so I gave it to them.  Since that time I've received a number of emails asking me how to put a lining in a fascinator.


Since I haven't had any sleep in over 24 hours, I'm asking you to forgive me in advance for my more than usual number of typos.   Please read over Foundations for My Cocktail/Fascinator Hats and I'll start where I left off, almost.  Rather than working with a stretch material I will be covering this hat with two layers of suede, one of which will have to be blocked before it is sewn to the buckram foundation.  I will also block the lining.  


I'm growing tired of wining about seeing millinery fabrics that don't hug the frames they cover.  So, I can either stop wining or do something about it.  I have to tell you that every time I see fabric that does not fit a frame correctly, I have an internal tantrum, especially when I see it in a high fashion magazine!  I'm working on this.  If you ever want to cure yourself of something like this just listen to someone else complain about something similar without helping or offering a solution.  Not so cute is it?


When I started taking millinery classes we had to steam and block everything.  We had to block the buckram, the lining, and all fabrics that were not stretch fabrics.  To your right is an image that shows suede that has not been blocked.  This does not look professional at all.


To block suede or leather, mist the inside of the fabric with water.  I use a very fine mister.  Stretch the fabric over a hat block and let it dry.  To stretch fabric that has a bias, stretch the fabric on the bias over a block and steam it, readjusting the fabric re-pinning as you steam.  It's just that simple.  See lining, below right.  I don't steam buckram anymore.  I prefer to mist it or do a very fast dip in water and work the moisture three the fabric in my hands.  This way the buckram appears to dry harder than it was originally (same as steaming it).


Using a glover's needle (leather needle) sew the suede to the frame catching only the crinoline.  The second layer of suede, the black mesh, did not have to be blocked because it automatically hugged the frame.  However, I blocked the lining.  


Note:  If you are adding trim to your hat, sew the trim on before the lining is attached, if possible.  Use your best judgement.


After the lining has dried, lay it into the crown and pin it to the suede using fine quilting pins or millinery pins (fine quilting pins are easier for suede and leather).  Stitch the lining to the suede about  1/4 th inch down from the edge of the hat.  Trim the lining; it is not necessary to turn the lining under. 
  Note:  Every layer of fabric, including hat band, diminishes or adds to the inner or outer  side of a hat.  Although turning the lining under does not affect this type of hat, it will affect a full crown hat. Remember, by turning the fabric under you will have an additional layer of fabric.   I prefer to trim the lining down rather than turn it under no matter what type of hat I'm working with.
Swirl your  grosgrain ribbon (petersham in some places, sawtooth to some), pin it to the suede (remember that the lining is 1/4 th inch down).  stich it into place.  


Additional Images


Adding support wire for feather:  Added feet to the wire and stitched them under the black suede mesh.


Feather Trim:  Feather curled in opposite direction of curve, using  my thumb's nail to pinch the spine approximately every 1/4 th of an inch.


Lining Fabric:


Lining Fabric:  Design created using my logo in graphics software and printing the fabric on my Epson printer  (fabric will have to be attached to paper before printing).


O.K., the label is a bit overkill!


Final Notes:  Please take advantage of the free online resources in the sidebar of this blog.  Also, purchase a reference book.  My first millinery book was "From the Neck Up." You can find it on the author's site, on Amazon, Ebay, etc.  I didn't go into detail as far as stitches, etc., are concerned because I really feel that if you are new to millinery, you should do some exploration and experimentation on your own.  If possible, take a class.  


If you do not have a block, purchase a wooden bowl of similar shape and block and make frames using the bowl.  


Have fun!!

Sunday, July 31, 2011

One of Several Fair Projects Submitted, No. 5--Headdress

Again, before I get to another one of my Los Angeles County Fair millinery 2011 submissions, just a reminder that I'm conducting a "Make Your Own Art" millinery supplies contest giveaway.  The deadline to enter is August 4, 2011.


Well, I've almost completed my parade of county fair submissions; I have one left after this one.  I was debating whether I should show my worst hat in this post, but I decided to save  it for last.  By that time, all of us will have reached our tolerance for these submissions.   


This entry fell under the "Class 5, Headdresses/"Super-sized" Hats" category.  It was made of sinamay and trimmed with a feather and horsehair.  After over 24 hours without sleep and having only three hats completed for the milliner contest, I was desperate to complete at least one more hat.  Category 2, "Purchased/Embellished Hats," was definitely out.  Not only did I not like trimming these, I was lousy at it.  So, I was sitting dazed, unable to concentrated, trying to figure out what I was going to do next.  As I set looking around my room, I saw felt and straws blocked on hat blocks, I saw my purchased hat to trim; even tackling one of these would take too long.  I needed sleep, the faster the better.  


Over on the wall in a tall box stood rolled buckram and sinamay, yes sinamay!  I had enough energy to cut a wide bias strip from this flexible and forgiving material.  I didn't know what I would do after I cut the strip, but I would do something!  I folded the fabric twice, may even three times, and started pulling on its edges like a crazed woman, no idea of the finished product in site.  The headdress had to be 16 inches tall.  Yes, yes, I would use trim to accomplish this!  I looked up at my feathers all stuck in a large chunk of foam.  I ran over and pulled out the longest feather in the bunch.  How was I going to get this feather to stand up?   I thought, "just stick it between the folds of the sinamay,  DON'T THINK JUST DO!   Have you ever tried to think when you've been without sleep for over 24 hours?  O.K.,  trim is not my friend; I prefer little of it, at least on the hats I make, but I'm not making this hat for me.  


Well, back to supporting the feather, just keep pulling the sinamay, I thought, the feather will find a place on its own.  As I pulled and pulled on the bias edges of the fabric, more on the top, the fabric started to point to the ceiling.  I'm on to something here!   The feather is pointing to the ceiling!  Oh, I know, I'll wrap the fabric around the feather and tack it, yes, yes...I'll put in a half headband, attach the horsehair, and then I can go to sleep....  I'll skip the puff of steam; I need sleep!  


I actually liked the results of my mindless, crazed efforts.  I needed my daughter's opinion.  She likes every thing I make, but by this time I actually can tell the difference between "I like it mom" and "WOW."  She gave me the WOW, I mean really!  Now I could go to sleep, at least for two hours. 


 If you're interested in viewing my other entries, check out my jewelry piece, felted hat, envelope hat, and my hat pin cushion hat.

Sunday, July 10, 2011

Six Days Away and No Hats for the L.A. County Fair Millinery Contest Yet! A Look at More Unfinished Projects

In my last post I mentioned my dilemma concerning my family reunion, the fact that I have not started making hats for the L.A. County Fair Millinery Contest, and I shared an unfinished project.  Well I have some good news, and I have some not so good news.  The good news is that one of my classmates will be delivering my hats to the fairgrounds on Saturday, the 16th.  The not so good news is that I still haven't started on the hats that she will be delivering .  Remember I mentioned that I always submit paperwork for five hats, but I've never met that quota yet.  Well I'm determined to deliver five hats this year, but then I was always determined to deliver five.  I didn't mention that I also submitted paperwork for three arts and crafts projects, one jewelry piece (already made!), and two hand felted hats (one project 25 percent made).

So why can't I get started making my hats?  For someone like myself that has been making hats forever, it's quite easy to make a hat.  The issue is designing the hat.  Designing a hat is hard work, especially if you want something unique.  Once I have a design in my head, I can proceed with the making of the hat at a speedy pace.  So, I'm happy to report that I have a design for one hat!  Are you as excited as I am?  You may ask, "but you've had months to work on your designs, what have you been doing?"  My answer to that is:  six months, six days, six hours, there is no difference, at least for me that is.

Oh, there is a second issue that drives the design, at least for the contest; I need a "hook"--something catchy.  Have you seen my hats (if you follow the link, click on large image to view all 50 images). I presume you have if you follow this blog.  I'm not a catchy person.  I make hats for meditative purposes, mostly; I make hats to explore new techniques, new materials, for research purposes, to teach someone something, etc.; plus making a hat is easier than seeing a psychologist.  Millinery is my favorite hobby.  Oops!  I was told that if said millinery was my hobby, no one would respect me.  To that I say, Oh Well!  OK, getting back to the issue at hand--the hook.  I love model (runway?) millinery.  I love all millinery, but I'm not a model millinery person; although I'm trying to add some of these skill to may skill base because most people like to wear something unique .  I also love workmanship.  To make a long story short, from what I learned last year, the hook will be more important than the workmanship.  Please, don't misinterpret this statement.  What I'm saying is that a catchy item evokes more attention, more passion.

Finally, to my unfinished projects.  The image above shows two of the projects I have on blocks that have been sitting around, again, forever.  The 1930s/1940s cap block is one of my newer block.  Sometimes when I receive a new vintage or antique block, I block on it.  Notice, the paper towel wadded up and placed under the blocking card to help define the dent in the tip of the block. ( No, cord marks will not show up in finished product after I complete it.)  Also notice that the millinery pin that holds the cord in place is actually pushed into the knot of the cord rather than into the hat block itself.  I do this because I love these old blocks as sculptures rather than as hat blocks.  This technique is not for everyone.

The green cloche was blocked on a vintage balsa utility cloche bloc--see image to your right.  Remember that I mentioned that everyone should have a utility hat block (standard balsa wood utility skull hat block).  You can run a small business with only a utility block.  Add a basic brim block block, and you can conquer the world!  Although I pin into all of my utility blocks with millinery or finer pins, and in some cases, push pins, it's still a little hard to do so with this block.  This is a special utility block that has a defining line cut into it just above where the eyebrows start, back around to where the hat ends at the neck--1920s style.  This block has a slightly different shape than the block I sold.  As a matter of fact, I purchased another cloche block with the money I received from the sale of that block.  Remember the draped cloche here; it was blocked on the utility cloche block.  These blocks are asymmetrical, and they also vary in shape from block to block, plus there is no need to always try to figure out how deep this style of cloche should be blocked.  The foundations and/or hats made from these blocks can be manipulated in fascinating ways!   If times run out, dull or not, one of these hats may show up at the fair, especially if I run out of time.  I enjoy making these old, outdated millinery styles.  From time to time, you'll see one of these on the runway; after all, history repeats itself.

What types of hats do you like to make or would like to learn how to make?  What types of hats do you wear?  Do you like the more trendy styles (fascinators--cocktail hats, whimsies), or do you like the more classic styles, in general?  Whatever your preference, have fun with it!

Note:  Remember the poll concerning what types of tutorial you would like to see here, and millinery trim was the winner.  Well, notice the green cloche and how intricate it is.  I also consider the tacked folds on this hat to be trim.

Thursday, June 30, 2011

The Cabbage Rose Class Project, No Summer School, and Other Ramblings


Summer School Ends  Thursday, a week ago, my evening millinery class was buzzing with activity and chatter.  You see, it was the last night of class before summer vacation.  Not only was it the last night, but for the first time since I have been taking millinery classes, over a quarter of a century on and off, there would be no summer school because California budget cuts caused LAUSD  to ax our millinery classes, as well as some other summer classes.  Back when I started taking classes, summer school was a time when we would cram everything in--flower, glove, purse, and jewelry making, including shoe covering and sewing, and hat making, of course!  Oh, how I long for those summers of creativity!  These classes serve adult learners, including seniors, and high school students needing to take additional classes, usually for graduation.

Cabbage Rose Project  What was all the chatter and urgency about?  Well everyone was excited about the cabbage rose Mrs. Eloise King, our millinery teacher, was demonstrating to make on this last night.  Several of the students had made the rose earlier to trim their hat, and it was so beautiful that everyone in class wanted to make it.  This was not the only rose being taught this night, but this was the one that really peaked my interest.  Unlike the cabbage roses I had made in the past using strips of folded fabric, this rose, although it looked very similar, was constructed in a unique manner.  It was this construction technique that intrigued me.  This rose was constructed using 12 squares of fabric of varying sizes.  Each tier of the rose was a pod that fit into the pod below it, and none of the tiers were attached to the other--they floated inside each other like a flower in water.  I made a very large red flower from thin suede, not to be used as trim, but as a hat.  The suede yielded a heavier flower than I liked, but I was fascinated by the results.  Mrs.  King suggested that I turn the edges down, and the result was spectacular!
.
Why All Those Millinery Classes  You're probably asking, why is she still taking millinery classes.  Well, my calligraphy classes only lasted eight years...and then there was the paper making, the jewelry making, elementary and high school (of course these are out in order), college, college, additional technical classes, etc., etc.  To make a long story short, I'll never stop learning, and it's something I can fit into the rest of my life, for the rest of my life.  

Sharing  When my kids were small, I made hats for extra income while working my regular job.  I actually dreaded making another hat then--the deadlines, etc.  After a while, I started making hats only when I wanted to and gave them away to family and friends; boy, did I love this.  Plus, sharing was and still is a great way for me to give back.  Now retired, I love it even more.  The research and experimentation never ends!  

For those that email me and are surprised that I share so much, I ask, what is there not to share?  I know how you feel because I've seen how some act if they are asked a millinery question.  In my millinery classes we pass hat patterns around as if we were passing around tea cakes.  For years no one even thought about "copying."  Even back in the day when many of the women had millinery businesses, they never felt threatened and always shared.  Today occasionally someone will come through that will take but not give back, but that has only been within the last few years, and they don't stay very long because "they're on a mission," excluding those that stop in to further their careers.  Not everyone has the time to just hang out.  There is a difference.

I've been told that people will not respect me if I just "give it away;" people will just use me up; people will just sell the information.  To that I say, this is about me and what I enjoy doing; there are still good, honest people in the world.  I'll leave the respect to those that really know me, and I will not stop doing what I enjoy doing because of others' issues and insecurities.  Somewhere in the world someone, especially in these times, will need a little extra cash that learning millinery will bring them; someone will need a hobby that they can enjoy without spending a fortune to pursue; someone, because of their location will not have access to millinery classes or expensive millinery supplies; but many will have Web access.  It will not replace formal instruction in many cases, but it will help to a certain point, and big time if hard work goes into learning.  

Kicked Off Yahoo Answer  This leads me to another issue.  Recently I signed up for Yahoo Answer where you ask and/or answer questions on various subjects.  Of course, I searched out millinery and hat making questions and answered them when I could.  Shortly afterwards I was reported for inappropriate language and kicked off--the same language I use here on my blog.  After several emails back and forth to Yahoo (one of those everybody-gets-the-same-email, emails), it was clear that they were not going to investigate.  So, it appears that there is a problem with sharing.  The next time someone is bashing someone on the Web, ask yourself why.  I've learned so much in the last year and a half about how evil some people can be.  What a miserable waste of life.

What do you think?   What is the issue with sharing techniques that have been documents in books down through the years?  We are not talking about the Coca Cola formula here.  Unlike hatting (making men hats), millinery is not a trade that is passed down from family to family--its secrets.  Plus today, there are those that make exquisite men hats without all those guarded secrets.  This does not involve someone's line or technique they have created.  So, I'm I that much out of touch? I would really appreciate your thoughts.

Please note that there was a typo on the County Fair millinery flyer.  The delivery date is July 16, 2011 and the delivery time is from 8:00 a.m. to 5:00 p.m.

Monday, June 20, 2011

French Couture Hand Rolled Silk Organza Flowers

Please note that there was a typo on the County Fair millinery flyer.  The delivery date is July 16, 2011 and the delivery time is from 8:00 a.m. to 5:00 p.m.

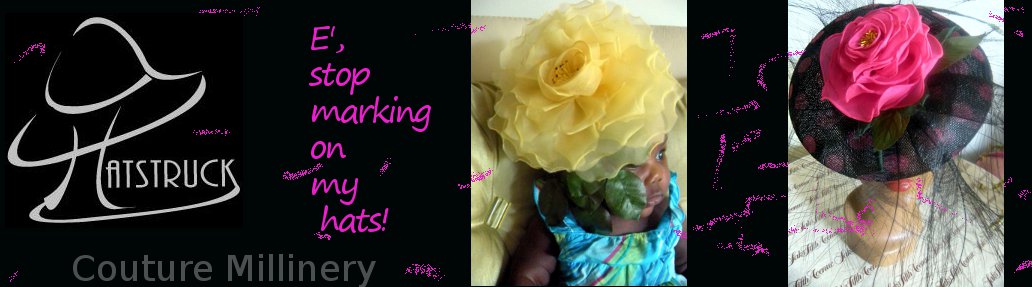
OK ladies and gentlemen, I couldn't resist this one.  I just had to use Ms. E' as my flower model for this post.  She is just the cutest little thing--almost four months old now.  I'm having so much fun babysitting her each day.  I missed all the cute little things my kids did, like their first steps, etc., because I was busy working everyday.  You're lucky that I can't paint a mural of her on your living room walls just so your hearts could  smile as much as mine when you see her.

Ms. E' is modeling one of three silk organza hand rolled flowers I recently made.  When I first learned how to make these hand rolled flowers a couple of decades ago, we would spit roll the petals.  "Did she just say spit roll, as in saliva!"  Yes, I did.  Well, I don't do that anymore.  I don't think the world was as health conscious as it is today, and now I don't even want to think about it.  Today, I roll the flowers with diluted fabric stiffener or diluted white glue, using the same original pattern.  I make slight modifications to the pattern, depending on the effect I want to achieve, or I'll just make another pattern in some cases.

The top and bottom flower petals in the image to your right were cut from the same size pattern.  The petals of the flower on the top were given a very slight roll at intervals, while the petals of the bottom flower were entirely rolled going around the petal, except its bottom.  The flower in the middle is a slight variation of the other flowers; here I used less petals--same pattern.  For the center, I cut small pieces of fabric and dipped them into dye, the petals were painted with a paint brush.  I'll put together a tutorial for the top flower when I get a chance.  Oh, you'll also notice a red fascinator in the slideshow below.  The flower was both hand rolled and tooled using an electric flower iron.  I'm still greiving over the fact that I gave this hat to one of my friends.  That red rose was the most beautiful flower I ever made.  I couldn't get the camera to capture its beauty. I hope you enjoy the slideshow; I had fun making it.

Please check out my other posts on making your own flower stamens and how to make leather and suede flowers.

Please Note!!! There is a bug (error) in the image viewer. The images for this post should show flowers and a cute baby. If you see the fashion show images from the last post, please display this post by itself by accessing it through the sidebar.  Sorry for any inconvenience. 


Saturday, May 14, 2011

Whether You Call It a Fascinator, Cocktail Hat, or Whimsy, a Little Trim Goes a Long Way

When I published the poll results showing the tutorials you would like to see here, I was a little disappointed with the results (disappointed is too strong), although they were anticipated.  After all, how many people would like to make buckram frames and cover them--a labor-intensive process on larger hats?   As you can see, the highest score went to trim. So, for this tutorial I decided to use two things that almost all of us have access to, feathers and horsehair (crin).

I like to make flat pattern, buckram frame hats; wire frame hats, large brimmed straw hats.  I'm in a meditative state when I'm hand sewing an intricate design, or solving a design issue, or experimenting with a new technique.  I never give trim that much thought.  I put very little trim on my hats.  Most of the time I prefer to make my own trim.  Other times simplicity, line, and contrast are my friends.  Trim, in some cases, would only obscure them. This only applies to my design style, for I like many different design styles.  Thus, I was hoping that flat pattern buckram frames would be the high scorer.  So, I looked on the positive side, and I pulled out all of the stuff I continuously collect, like fabrics for flowers, leaves, feathers, etc., etc.  After all I'm always putting off making the trim I do use.  The journey will be fun.


I didn't plan to put a veil on this fascinator, only the feather.  While in class, (I've been taking classes for a few decades now), I was laughing and talking with my classmates and not paying attention to what I was doing.  I had originally planned to put the prettiest section of my swirled crown to the front of the hat.  Coming off from those swirls was a length of cascading, unraveled horsehair.  Well, I put the front to the back by accident, so I cut off the cascading horsehair and added the veil you see here. The back of the hat is where the grosgrain ends and begins.  That reminds me, I should always have you to mark the center front and center back when constructing your hats.  This is intuitive to me but may not be to someone new to millinery.

On to the tutorial....

You will need a fascinator base, of course.  See the sinamay base tutorial or the buckram base tutorial, if you would like to make your own, or purchase a read made one; horsehair, an ostrich or other type of feather, a paint marker or acrylic paint (optional), and a hat elastic; including scissors, needles, paint brush, and thread.  See last post.

The Feather

I presented two YouTube tutorials in the last post, Working With Feathers 101 and Cutting Feathers.  I added these two tutorials because they dealt with stripping and cutting feathers.  The important thing here is the cutting of the feathers.  Note that the feathers are cut from the top down, very important.

Not so noticeable in these images is the pointed tip on the feather.  So, strip the feather and leave enough on the feather for a point.  Cut the end of the feather from the top down on each side, forming a spear shape.  Pin the feather to your ironing board as shown in the image.  Now, without touching the feather, run your steam iron along the length of the feather.  After the feather has dried, remove the pins.   The feather will hold its shape.  The point here is that feathers can be shaped by bending them into position and steaming them.  Of course there are other methods, and I will address them at another time.  Plus, you may also go to YouTube or other locations on the Web for videos on the subject.  Research, practice, experiment.

 If you have a colored feather, paint its sides where the stripping has removed its color.

Because I wanted my feather to appear as if it was floating on my hat, I used a small hand drill to drill holds in its side of the feather.  After which, I painted the the holes with a marker.  I should have drilled the holes before I painted the feather sides--a senior moment.  After the feather had dried I sprayed it with shellac because the acrylic had dulled the finish.  Also, notice the transparent thread I used to sew my horsehair and feather onto fascinator base.  This would be considered unorthodox...oh well.

The Horsehair Vail

Horsehair is an amazing material that can be manipulated in wonderful ways.  It can be cut and torn as shown in this video, also from the previous post.  It can be blocked on a hat block or it can be blocked using a pressing iron.  You're only limited by your imagination.  Experiment, experiment, experiment.

Making the veil is pretty straight forward.  Simply stick your finger through the horsehair and rotate it until the hole is as large as you would like it to be.  Using your iron with a protective foot attach and steam (I use steam) or a damp pressing cloth with steam turned off, press over the holes.  They are now set in place.  For a little challenge, put in the ripples around the edge of the veil.

The point here:  know the materials you are working with so that if you don't find a technique in a book or from an instructor, you can achieve the goal you set out to achieve.  Just by knowing that it is possible to block (form, shape with steam, dry heat, hand manipulation, etc.) horsehair, it is easy to figure out how to create the holes in it.  Take note that you don't have to do something exactly the same way someone else do it.  Your goal is to achieve sound results that will hold up over time, leaving you with a light, neat, and well made hat.

The Horsehair Swirl (crown)

In order to form the crown, simply pull the horsehair down and out while pressing it.  You'll get the hang of it after practicing.  Press both edges.  Do not press the center.


Finishing Up

So, you have your fascinator base, I used a sinamay base from the last tutorial.  All you have to do now is attach your crown, veil, and hat elastic.  I'll let you figure this out.  It'll be your challenge.

Remove the thread from the edge of the horsehair.  It will not ravel!


Below is a cute video showing various ways of trimming a hats.

FASHION FEATURE (click on black box to start movie)

Saturday, May 7, 2011

How to Make and Trim a Fascinator Even Kate Middleton Would Love

First, Happy Mothers' Day All!!

OK, so maybe Kate wouldn't love this hat, but I think it's cute.

Some of you still have time to rush out and purchase a few millinery supplies if you would like to make that Mothers' Day Fascinator!  Well if you need a little help, this post is for you.


When a Web surfer enters a query into Google or any other search engine, they are given a list of sites that satisfy that query.  So, over the past week my site statistics have shown that the majority of the queries that led to my site asked the questions:  "How to make a fascinator?" and "How to make a fascinator base?"  Today, since it has been some time since I've been in touch with you, I'm making a hasty post; I'll address the fascinator base (frame, foundation).


I've touched on the fascinator before when I introduced the buckram fascinator frame in a previous post, but this time I'll show you how to make a very easy fascinator base using sinamay, no traditional foundation blocking  needed.  Don't forget those fascinator tutorials published by Threads Magazine; they were absolutely wonderful.  Also, check out how to make a bow, including how to make faux feathers.  Don't leave the site until you've queried on  millinery, hat making, hat trimming, and hat embellishment for even more millinery tutorials.

If you don't want to make your own frames, besides being an excellent source for vintage millinery supplies, California Millinery manufactures buckram frames on site of all types, shapes, and sizes and at reasonable prices.  Here is a link to some of their smaller frames.  These frames do not in any manner represent what they have in stock.  You will have to call them for more information, since the site is incomplete.  It would probably be worth your while to order frames from California Millinery even if you don't live in Los Angeles, especially if you are interested in purchasing frames in bulk; they will ship anywhere.  Diego is fabulous!!!

I've just published my first YouTube video, and I'm so excited!!  The video demonstrates how to swirl grosgrain ribbon.  I've noticed that many of you new to millinery have gathers and gaps in your headbands, your sidebands do not hug the side of your hats, and the edges of your hats have the same issues.  Knowing how to swirl your grosgrain ribbon will help to solve this problem.  Also, please realize that natural materials cut on the bias can be swirled.  As a matter of fact, you may want to cover the edge of your base frame with sinamay bias strips.  Do a little homework, explore the free online millinery books listed here in the sidebar. If you are not familiar with bias, swirling the ribbon, grosgrain, etc., it can all be found here just by following the reference links in the sidebar.  I hope you enjoy the video..


Now to the tutorial....

First make a circular (or other shape) pattern and from three layers of sinamay, cut out the desired size.

Using a buttonhole or whip stitch, attach millinery wire as shown in the buckram fascinator tutorial.

Swirl the grosgrain ribbon as shown in the video below.  Note that the ribbon should be a natural fiber ribbon or at least 40 to 60 percent natural.  Here in the States, at least in my vicinity, this ribbon is called millinery grosgrain or sawtooth ribbon.  I'm sure there are other names for it.  This ribbon has a "tooth" and it is not smooth on its edges.

Using a stab or catch stitch, attach the grosgrain ribbon.  See the list of  stitch videos in the sidebar.  Sorry, I have a tendency to misname stitches; I'll correct this in a future post and or revise this one.  I just do it, no thought, second nature. 

Over a bowl or a hat block, any concave surface, steam the fascinator base using your pressing iron.  Since the sinamay is sized (don't use unsized sinamay for this project) and because sinamay is a very pliable fabric, it will form to the curve of the mold.  Also, it will be stiffer than it was before it was steamed.

Take one of your bases and trim it to your desire.  For the hat above I've sewn one of these bases inside of the hat.  Please note that you do not have to cut your bases out in the same shape.  You could cut out bases of different shapes.

I prefer a hat elastic for attaching fascinators to the head because it can be positioned to almost any position without removing it.  If you don't have hat elastics (elastics with metal points on the end), take a large eyed needle, thread it with elastic, run it through the grosgrain, and anchor it with a stitch and a knot on each side of the base.  This actually works better than hat elastics because the metal tips have a tendency to slide off the end of the elastic.  Also, to avoid the metal slippage, I will crimp the metal with my wire cutters or my jewelry crimps.

For my non-English speaking friends that use a translator on my site, I will have to explain a few things that may not be clear in the video, since instructions appear written across the video frames.  For the edges of your hats and fascinators


Friday, April 8, 2011

Millinery Tutorial Poll Results

HATS:  HEADS AND TAILS (click on image to start video)


I asked you what types of tutorials you would like to see here, and I really appreciate those of you that took the time to participate.  I've been brainstorming ways that I could reward those of you that follow me, email me, and leave comments; so, there is a surprise coming to you very soon for your extra efforts.  Your support is greatly appreciated.  Additionally, I'm extremely passionate about couture millinery and the continued growth of this beautiful art form.

There is nothing new under the sun.  Enjoy these two vintage videos (one below also)  from the past addressing millinery trim (poll winner).  Here are the poll results:

  • Buckram Frames--Flat Pattern:      7
  • Buckram Frames--Blocked               6
  • Straw Blocking:                                    10
  • Felt Blocking:                                          8
  • Millinery Trim (flowers, etc.):        13
  • Other (no comments left):                  3
I estimate that 33% of my learning came from the classes I've taken over the years, and I never get tired of taking classes, if I can find them; 33% percent from books, other media, and observation; and 33% from experimentation.   In other words, I Never Stop Learning, Experimenting, and Taking Classes!  I've noticed something that's very interesting to me.  When a milliner is given lots of praise for their work and that work is in great need of improvement, in some cases that milliner ceases to grow because they grow to believe that they are as good as the hype.  So to those milliners just starting out, if your headsize ribbon is falling out of your hat; your headband does not hug the side of your hat; if your fabric (on covered hats) does not hug your hat frame like a fine glove, and it looks like you're gathering the waistband of a skirt; if you think blocking is only for felt and straws; if you spend more on glue than thread in your "couture workroom," etc, etc., please research why these things are happening.  

A second observation::  milliners with poor skills pass on their bad skills on.  Learn to tell the difference between a good and a bad milliner.  Ladies and gentlemen, there are too many fantastic milliners out their to study, past and present.  If you have learned to tell the difference between a well made dress and a poorly made dress or purse or shoes, you can learn to tell the difference between a well made hat and a poorly made one.  My work still needs plenty of improvement, and I'm not even a perfectionist!