
I've finally gotten to the point where winning or loosing a competition means very little to me, except for the mere excitement of actually seeing the finished entries. After all, winners are almost always chosen subjectively, and too many are left feeling inadequate even if they have wonderful design and/or workmanship skills.
 There is no denying that I love the prizes, if there are any to be had. The last time I won a Mad Hatters' competition, second place prize, I received a $125 gift certificate from Judith M Millinery Supply House. Let's just say that I have enough wire, wire joiners, and horsehair to last me for quite some time. My winning entry was "Outside of My Window," a plexiglass hat (left) fabricated in almost the same manner as "The Copper Lady" above, except that I used metal cutting scissors to cut out the copper hat and a jeweler's saw to cut out the plexiglass hat. Note that I could have also used the jewel's saw on the copper; it was just a matter of how I felt at the time.
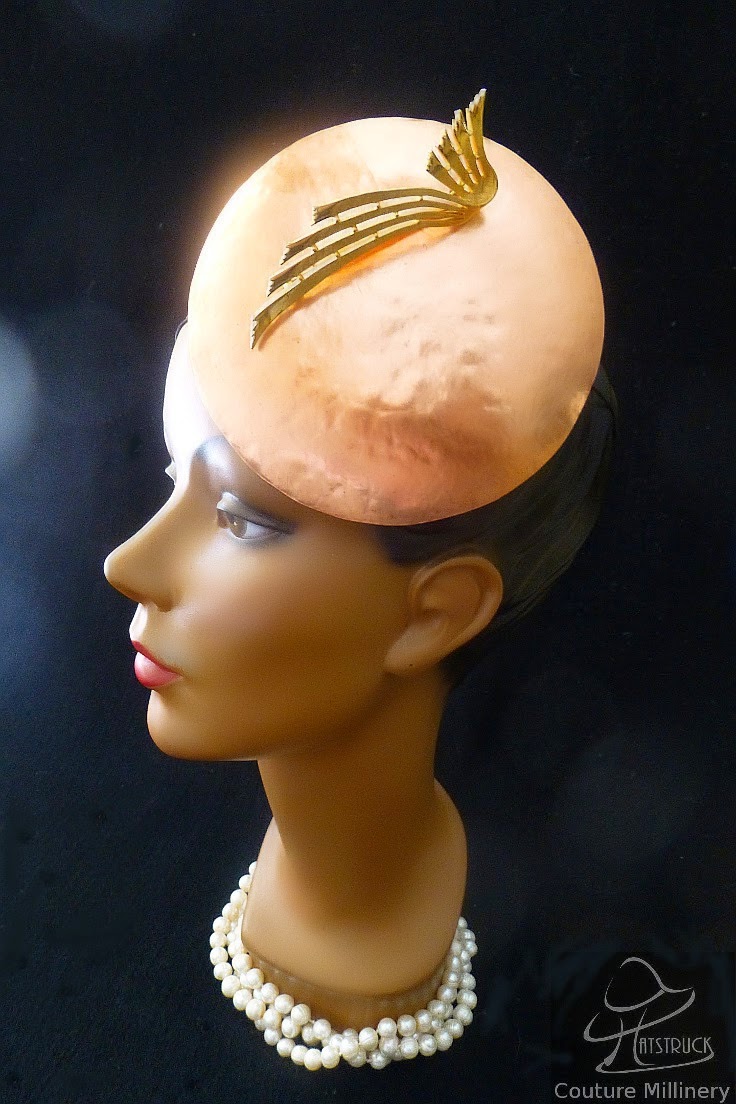 I created the "The Copper Lady" from copper sheet metal that I hammered into a dome. If you follow me you may remember how I write about how small my place is. Well, for my last millinery class I decided to make a brim ironing board for use at home, easy transport, and because let's face it, I just have to know that I can perform a task on my own in case I have to. One day I'll seek some therapy for this condition.
 |


The next submission, "Flight of the Midnight Butterfly," (left) also earned my stamp of approval. It was built on a wire frame that was blocked over a very large wooden fruit bowl. The wire was then covered with ribbon, net, lace, and vintage file tubing to cover the wire spokes.
I made flower from silk satin, making one bud myself and adding another vintage bud to balance it off.
The flower on Flight of the Midnight Butterfly
was made from silk satin. The fabric was sized with a fabric stiffener, stretched over my flower drying rack, then left to dry before moistening again, then tooling (shaping) the flower.


 I've often seen demonstrations where this fabric is hung up vertically to dry. Well, what happens if you hang fabric to dry vertically? It drys from the top first down to the bottom last. If the fabric has starch in it, then it will be stiffer at the bottom than at the top. So therefore, it is best to lay the fabric horizontally rather than vertically. If you don't have flower irons and would like to try your hand at at simple flower making, I have two Youtube videos on flower making: one for a simple leather flower and the other for a simple fabric flower, neither requiring flower irons.
I've often seen demonstrations where this fabric is hung up vertically to dry. Well, what happens if you hang fabric to dry vertically? It drys from the top first down to the bottom last. If the fabric has starch in it, then it will be stiffer at the bottom than at the top. So therefore, it is best to lay the fabric horizontally rather than vertically. If you don't have flower irons and would like to try your hand at at simple flower making, I have two Youtube videos on flower making: one for a simple leather flower and the other for a simple fabric flower, neither requiring flower irons. 
born.
 This fur felt, beaver finish hat looked simple enough to complete, but it was not. Like most of my hat blocks, it was the first time I had blocked on it. So I had no idea that I would be unable to take a much needed shortcut; much needed because I was exhausted having worked on a project with my daughter while working on my own project. Manny times, in vintage hats, a sprung wire was required. Springing the wire is a simple technique that has a simple meaning--straightening standard millinery wire, NOT STEEL WIRE--in order to add tension in the correct place(s) on a hat.
 Sprung wire sits inside of a hat, and usually it does not have to be sewn into the hat when needed. Well, Elenore required the oposite, and the manipulation and placement of that wire affected the shape and integrity of the hat. The hat would not stand at attention without the wire. I've taken up many shortcuts since I've started making hats, but this is one technique I've not dropped, especially when dropping it affects the integrity of the hat. Hat blocks are funny objects, their finished products require different applications, some of these applications are realized only after the material has been taking off the block and after one has started working on it
 Finally there is "Belle" to your left. Belle's buckram crown was blocked over a wooden candy dish. It was covered with sequin braid, velvet tip; trimmed with horsehair, and graced with a vintage Trifari brooch (yes, I like vintage brooches). "Belle's" lining was blocked over the same candy bowl as her crown was. This hat was just not worth the time it would take to make a tailored lining.
 I was not pleased with, "Belle." There was just something lacking in workmanship with her.
Perhaps it was the lack of control I had over the cut, fringed horsehair trim;
perhaps I should have double layered it. That's what I'll do next time. "Belle's" lining was blocked over a candy bowl. This hat was just not worth the time to make a talored lining.
I was not pleased with, "Belle." There was just something lacking in workmanship with her.
Perhaps it was the lack of control I had over the cut, fringed horsehair trim;
perhaps I should have double layered it. That's what I'll do next time. "Belle's" lining was blocked over a candy bowl. This hat was just not worth the time to make a talored lining. I have quite a few hat blocks, but surprisingly I use wooden bowls to create most of my hats. I even pin into these bowls, something I would usually never do with my hat blocks. I guess I use wooden bowls because using them keeps me grounded, knowing that this craft can be as simple or as complicated, and as economical or as expensive as I make it.
Words of Inspiration
More than sharing these hats with you, I hope you go away with the understanding that millinery, contrary to what some may say, is not always an expensive craft. Especially couture "French Room" millinery, also referred to as piece-good hats a few hundred years back. Yes, straw and felt are expensive today. When I was buying more of it, before millinery became popular again, the prices were much lower. It's a matter of supply and demand today. Again, you can make this craft as economical or as expensive as you would like. There are beautiful linens and silks and leathers, etc., out there. There are discount fabric shops; bowls to block on, etc. If you can't afford all of the bells and whistles starting out, start out little and accumulate over time; that what I did. I have many bells and whistles and I continue to accumulate them, but I very seldom use them. I think I'm more of a collector of millinery tools and equipment than a milliner sometimes. Lastly, considering French room millinery (covered hats, hand made hats), would allows you to create more unique hats, in my opinion.
A little while ago I created a YouTube video, "






 Posts
Posts


