Tuesday, April 29, 2014

Oh No! Not Another Post on Millinery Buckram Foundation Material!

 
Hi all!  Rather than trying to figure out what to post next, I've decided to take advantage of some of the images I've taken over the past weeks and months.  So, I'll share with you the last buckram frame I made and once again give some of the reasons I think buckram is a great foundation material.  After all, it hasn't last a couple of hundred years because of its looks.  Lastly, I'll share a image of some of the last hat blocks I acquired.

Depending on when we entered into the millinery scene will determine our affection for and choice of millinery materials.  For me, it's buckram and finely woven parasisal (replaced with inferior grades).  For my millinery instructors it was willow, also referred to as espartre in some portions of the world. They spoke of willow as if they they were speaking of fine wine or exquisite diamonds.

When it comes to millinery foundation materials, my knowledge is limited to my exposure to it, including the successes I've had with it.  So here are a few reasons I prefer buckram over most other foundation materials:

It is a natural fiber:  So what's so good about buckram being made from natural fibers?  Well with the number of ladies I see fanning themselves these days, I think some of you know one reason.  Light natural materials breath and they allow you to breath.  Enough said.

It is light in weight:  One of my millinery teachers, Mrs. Eloise King, would always say that, "A hat should be as light as a feather."  Well buckram with its mesh construction delivers this lightness.

It is easy to sew through:  Although buckram frame edges are covered with crinoline (the fabric) or another thin bias cut material for the purpose of attaching fabrics to the frame, sewing through any portion of the frame proves to be an easy task.

It sticks to itself:  Now this is a big one!  Some don't realize this, or they do realize it but they don't take advantage of this property.  The reason I know it is because when it comes to those deep brims and concave crowns, some reach for the spray adhesive or some other type of adhesive.  Although this adhesive property does not work on all materials or for all situations, it works on the majority.  Further, you would only use this property depending on the fabric and the finished effect you would like to achieve.  I can't tell you the hell I would go through before I finally figured out how to take advantage of the buckram-sticky-thing when working with really deep cuff brims.  I'll also say that I absolutely hate when I see the underside of a hat brim falling and not hugging its underside (top or bottom), as if it was the lining falling from the top of an old 1954 Chevy.  I just want to shout, "WILL YOU FIX THAT THING!"  None of the hats here have any type of adhesive on them thanks to the flexibility of good old buckram.  I'm not against adhesives; they've always been used in millinery--yes even couture millinery.  I'm just not too fun of glue guns, but that's my issue..  

It can be used to construct flat patterned frames:  Not much explanation needed here, except that the frames can be as simple or as complex as needed to be.

It can be used to capture any hat block or object shape (molded frames):  Yes, any!  I mentioned this above.  The hat form (frame) to your right was molded over a wooden bowl.  It was used to construct the hat in my previous post.  You may also remember the post I made on the Draped Vase Hat.  The hat frame used for that hat was blocked over a ceramic vase, using one piece of buckram.  The frame to your right was constructed using multiple bias strips.  The way you construct your frame depends on your mood, your preference, and/or the type of fabric you use to cover your frame with, and it also depends on the complexity of the object you are constructing your frame on.
No matter what the shape is, you can always get buckram to conform to that shape.  You don't have to stitch it, and you don't even have to tie it down.  The frame above was neither stitched or tied down or pinned down.  However, you can secure the buckram if you feel you should.

It is affordable:  At 60 inches wide and coming in under $10 a yard, you can make many hats from one yard of buckram, depending on their sizes.  Remember the post "How Many Hats and Accessories Can You Make From One Yard of Fabric?"  Well, this also applies to buckram yardage.  The image to your right shows the hats I made for that post, and the video shows the accessories. By the way, all of the hats made in the video were blocked on wooden bowls, the black hat two bowls taped together to form a small crown and a brim.

If you don't live near a millinery store or ordering it over the Internet is not an option, and all you have is a fabric shop, you can you may be able find it in the upholstery section of your fabric shop, unsized; or you may be be able to find it amongst the tailoring fabrics in your fabric store, again unsized.  This means that you can size your own buckram.  If you can't find unsized buckram, one of the cotton upholstery or tailoring fabrics can be sized and used exactly in the same manner as millinery buckram if you don't have access to it.  But I will speak on this in another post.  We don't live in a perfect world so we must make the one we live in work for us.


I can go on about buckram, but I don't want to bore you.  It all depends on how well you master buckranm how much you will grow to like or dislike it.  No, buckram is not the latest kid on the block.  It's not sexy; but it works, and it works well.  If you don't like it, it's probably because you haven't learned to use it to its 
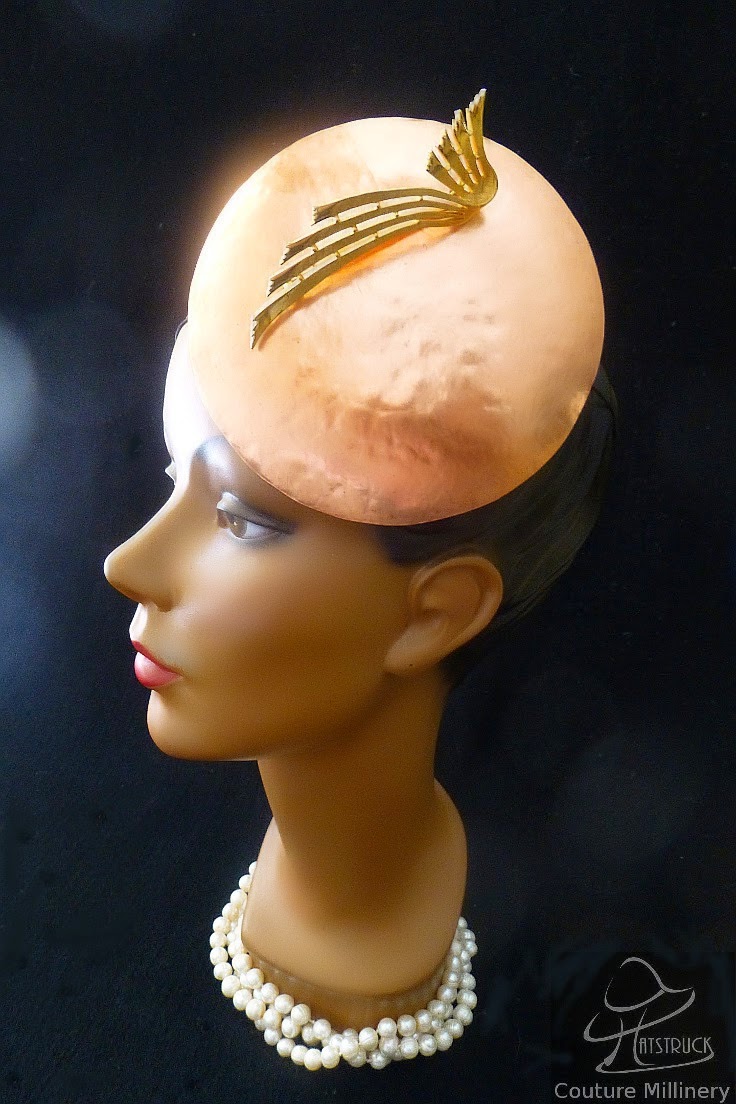
fullest extent.   Go out there and explore the many other alternatives to buckram if you have a desire to do so and find your best fit for your millinery era.  Just have fun doing it.

Last, I thought I'd share images of a few of my latest acquired hat blocks.  If you are a regular reader of this blog, you know how much I love a bargain.  Well one of my latest bargains was the acquisition of almost a dozen blocks.  Here are six of them.  I also found another mannequin head that matches my other display head, both coming from the Salvation Army.  The blocks came from one of Mrs Essie Edwards' farmer millinery students that was hanging her hat up for good.  No matter how many blocks I pick up, the majority of my blocking occurs on bowls or utility blocks.  So you see, millinery is a very affordable craft, depending on your choice of materials and equipment. 

Monday, April 21, 2014

Using Alternative Millinery Materials; Contests Results

 First of all once again I have to apologize concerning the quality of my images.  My favorite camera is dying and my newer one is just not "cutting the mustard."  The newbie is not making me look good at all; oh well.

I haven't been posting as much lately, so I thought I'd take this opportunity to do so, taking advantage of resent events and the images that I took for those, one being the Mad Hatters competition.  The winners were announced yesterday, for which I was not one of them.  Another event was a Facebook fashion show I participated in.  Finally I want to discuss using alternative materials for making hats, and saving a few dollars while doing so.

I didn't place in the Mad Hatters competition but I did get an honorable mention.  Considering that there were probably over a hundred entries and so many great entries, I thought the mention, for "The Copper Lady," was quite impressive.  I also want to point out that many of the entries that didn't win or receive a mention were also awesome.  Actually I had my eyes on the Second Prize--a ton of sinamay; oh well next time. The judge for the competition was actually one of our local Los Angeles milliners, the internationally known Arturo Rios.  Thanks for a fabulous contest Mad Hatters organizers and thanks to a great judge.

My next hat entry was for a Facebook fashion show, Men in Hats, a group dedicated to, none other than, men waring hats.  The group's founder, Ron Shelton, is also the owner of Res Hats.  I have to admit that my show entry was a bit tamed compared to Ron's and others' hats.  I'll have to practice on creating a more dapper hat next time.  So this leads me to the final purpose of this post, using alternative millinery materials.

Over the years I've collect so much stuff.  I'll call it stuff because it no longer has a purpose.  My tastes have changed, and styles have changed but I still hold onto the same dull fabrics and trims that I purchased years ago.  What makes it so bad is that I keep adding to them.  Anyway, I thought I would pull out some of that old stuff and make a hat from it.  In this case it was burlap yardage.  If you were country raised and had hogs and other animals, you'd probably remember it as feed sack material that animal food came in, also referred to as croker sack.  You will also recognize it as the same material that jute hat bodies and hoods are made of.  So actually this material is not new to millinery.  Yes, croker sack, burlap, and jute are all one in the same.

I created my hat for the fashion show from jute and pigskin leather; the bill, a retractable bill (don't ask me why I made it retractable), was covered with fine pigskin leather.  The cost for the entire hat probably cost under $8.00 because I purchase my fabrics from a discount store closer to my home than the downtown Los Angeles garment district.  Had I purchased it in the district, it would have cost less.  I wanted to point this out because I constantly hear how expensive millinery is.  It doesn't have to be.  The fine pigskin leather and the beautiful silk satin I used to make the flower in my previous post both came from my favorite discount fabric store; no compromise in quality, because the store chain actually purchases stock from businesses that over purchase and/or have gone out of business.  I purchased the fabric to make a utility purse; no, I never made it.  If I had purchased it for a hat, I would have purchased it in a finer more attractive quality.   I also purchased the feathers from the same store.

So how did I make this hat?  I sized the fabric in water diluted fabric stiffener.  I love Stiffy because it does not turn yellow.  Experiment with your own stiffener (white glue, etc.).  For those of you that crochet and stiffen doilies, you will have no problem sizing (stiffening) this fabric because there are tons of recipes out there for that purpose.  Finally, after the fabric had dried on the block, I sprayed it with spray on shellac.  This gave the hat a slight shine, and it also softened it a little, giving it the right amount of flexibility.  You could also use a spray-on lacquer.  These spray on products serve to protect the hat from the elements and to maintain its firmness.  Usually when I use something from a craft or hardware store and I'm spraying a light color fabric (fabric yardage, felt, and straw), I look for a non-yellowing product.  

You will notice in the above paragraph that you did not need to purchase anything from a millinery supply.  This is for those that only have access to a fabric store or a community store that sells a variety of things.  By no means I'm I suggesting that you not purchase from a millinery supply.  What I'm saying is, if you don't have access to certain supplies, use what you have access to.  Learn French room couture millinery techniques and make "piece good hats" from fabrics you may already have on hand--a leather skirt, some linen fabric, sheer fabrics, cottons, wools, etc.).  In another post, one day, I'll write about creating your own foundation materials.  In the meantime, as I mentioned, there are plenty of resources out there if you will only do the research.  Please, please, don't try something one time and say that it does not work!

In my last hat class as I went on and on about fur felt and my likes and dislikes, one of the students asked, what if you just want to have a regular hat to kick around in, to paraphrase, for which my lips were glued together.  However, it caused me to stop and think, why put a ton of money into an everyday hat that you throw around, and this hat is the answer, at least the materials used and how it was sourced.

Again, use what you have on hand and stop thinking about what you don't have.  Either carve yourself a hat block.  It's easy to learn, or collect wooden bowls, etc., to block on.  We don't live in a perfect world and wanting everything to be so will only hold us back.  So, if you don't have access to millinery classes, then do the next best thing.   Take advantage of the many resources that you do have access to, including millinery books, many of which are free online books; online millinery tutorials, and use observation.  Observation is so important; I have learned so many things through observation.  Also, learn basic millinery concepts; one very important one used in couture millinery is bias and how it's used. 

Finally, as I have written so many times, stop agonizing over how someone else does something, and step out there and think for yourself.  Experiment and write your own book, sort of speak, just as the person did that you refer to as an expert.  When you hear someone talk about sound millinery practices, step back and observe them and ask why they are so bent on you not using alternative materials and methods.

Good luck on your millinery journey.


Friday, April 11, 2014

My Hat Submissions to the Mad Hatters Society Millinery Competition on Facebook


I thought I'd share the hats that I submitted in The Mad Hatters Society's 2014 MHS Annual Competition on Facebook.  I'm sure that everyone that follows me on Facebook has seen these hats too many times already, but I wanted to share them here with my blog followers that don't follow me there, or with those just passing by.  By the way, if you are not a follower of this blog, please consider following it and signing up for email alerts.  Your support would be greatly appreciated.  The same invitation goes out to those that follow my Pinterest boards.


Interring millinery competitions gives me an opportunity to make hats more often, and also to sort of "push the envelop" (be a little more creative than I would usually be).  I also have a tendency to reevaluate and to make a conscious effort to improve my millinery skills while working on a hat for a competition.

 I've finally gotten to the point where winning or loosing a competition means very little to me, except for the mere excitement of actually seeing the finished entries.  After all, winners are almost always chosen subjectively, and too many are left feeling inadequate even if they have wonderful design and/or workmanship skills.

There is no denying that I love the prizes, if there are any to be had.  The last time I won a Mad Hatters' competition, second place prize, I received a $125 gift certificate from Judith M Millinery Supply House.  Let's just say that I have enough wire, wire joiners, and horsehair to last me for quite some time.  My winning entry  was "Outside of My Window," a plexiglass hat (left) fabricated in almost the same manner as "The Copper Lady" above, except that I used metal cutting scissors to cut out the copper hat and a  jeweler's saw to cut out the plexiglass hat.  Note that I could have also used the jewel's saw on the copper; it was just a matter of how I felt at the time.

I created the "The Copper Lady" from copper sheet metal that I hammered into a dome.  If you follow me you may remember how I write about how small my place is.  Well, for my last millinery class I decided to make a brim ironing board for use at home, easy transport, and because let's face it, I just have to know that I can perform a task on my own in case I have to.  One day I'll seek some therapy for this condition.

 Using a folding wooden food tray, I cut out a half circle with my jeweler's saw and some carving tools.  Crazy, yes!  Well, conditions may not always be perfect, so I believe in using what I have on hand to accomplish what I need to at the moment.  Anyway, I will not be doing that again with those particular tools, but at least I know if I had to do it I could.  Since I needed a concave wooden area to dome my sheet for my hat, I carved one into the brim ironing board, to its side.  Now I don't have to pull out my steel doming block to make a pair of earrings because I can use the same concave area for them.  Plus, I can iron my hat brims, I can attach my jeweler's saw block, I can make large earrings, and I can dome little cute hats all in one tiny area without unfolding my work table, if I had to.  Finally, I finished "The Copper Lady" off with  a removable vintage Trifari brooch for interchangeability.  I was extremely pleased with this hat, so simple, but so bold and elegant.

The next submission, "Flight of the Midnight Butterfly," (left) also earned my stamp of approval.  It was built on a wire frame that was blocked over a very large wooden fruit bowl.  The wire was then covered with ribbon, net, lace, and vintage file tubing to cover the wire spokes.

I made flower from silk satin, making one bud myself and adding another vintage bud  to balance it off.


The flower on Flight of the Midnight Butterfly was made from silk satin.  The fabric was sized with a fabric stiffener, stretched over my flower drying rack, then left to dry before moistening again, then tooling  (shaping) the flower.
 I've often seen demonstrations where this fabric is hung up vertically to dry.  Well, what happens if you hang fabric to dry vertically?  It drys from the top first down to the bottom last.  If the fabric has starch in it, then it will be stiffer at the bottom than at the top.  So therefore, it is best to lay the fabric horizontally rather than vertically.  If you don't have flower irons and would like to try your hand at at simple flower making, I have two Youtube videos on flower making: one for a simple leather flower and the other for a simple fabric flower, neither requiring flower irons. 

"Elenore" (left) was another one of my four entries.  Surprisingly, she was my hardest hat to make.  I wanted to take a shortcut, but that was just not going to happen.  I had blocked several hats weeks earlier.  They just sit on the hat blocks waiting for me to do something.  At the last moment, needing a fourth hat for the contest, a vintage 1930s/1940s sophisticated shape was chosen, and thus Elenore was
born.

This fur felt, beaver finish hat looked simple enough to complete, but it was not.  Like most of my hat blocks, it was the first time I had blocked on it.  So I had no idea that I would be unable to take a much needed shortcut; much needed because I was exhausted having worked on a project with my daughter while working on my own project.  Manny times, in vintage hats, a sprung wire was required.  Springing the wire is a simple technique that has a simple meaning--straightening standard millinery wire, NOT STEEL WIRE--in order to add tension in the correct place(s) on a hat.

Sprung wire sits inside of a hat, and usually it does not have to be sewn into the hat  when needed.  Well, Elenore required the oposite, and the manipulation and placement of that wire affected the shape and integrity of the hat.  The hat would not stand at attention without the wire.  I've taken up many shortcuts since I've started making hats, but this is one technique I've not dropped, especially when dropping it affects the integrity of the hat.  Hat blocks are funny objects, their finished products require different applications, some of these applications are realized only after the material has been taking off the block and after one has started working on it
 
Finally there is "Belle" to your left. Belle's buckram crown was blocked over a wooden candy dish.  It was covered with sequin braid, velvet tip; trimmed with horsehair, and graced with a vintage Trifari brooch (yes, I like vintage brooches).  "Belle's" lining was blocked over the same candy bowl as her crown was.  This hat was just not worth the time  it would take to make a tailored lining.


 I was not pleased with, "Belle."  There was just something lacking in workmanship with her.  Perhaps it was the lack of control I had over the cut, fringed horsehair trim; perhaps I should have double layered it.  That's what I'll do next time.  "Belle's" lining was blocked over a candy bowl.  This hat was just not worth the time to make a talored lining. 

 I have quite a few hat blocks, but surprisingly I use wooden bowls to create most of my hats.  I even pin into these bowls, something I would usually never do with my hat blocks.  I guess I use wooden bowls because using them keeps me grounded, knowing that this craft can be as simple or as complicated, and as economical or as expensive as I make it.

Words of Inspiration

More than sharing these hats with you, I hope you go away with the understanding that millinery, contrary to what some may say, is not always an expensive craft.  Especially couture "French Room" millinery, also referred to as piece-good hats a few hundred years back.  Yes, straw and felt are expensive today.  When I was buying more of it, before millinery became popular again, the prices were much lower.  It's a matter of supply and demand today.  Again, you can make this craft as economical or as expensive as you would like.  There are beautiful linens and silks and leathers, etc., out there.  There are discount fabric shops; bowls to block on, etc.  If you can't afford all of the bells and whistles starting out, start out little and accumulate over time; that what I did.  I have many bells and whistles and I continue to accumulate them, but I very seldom use them.  I think I'm more of a collector of millinery tools and equipment than a milliner sometimes.  Lastly, considering French room millinery (covered hats, hand made hats), would allows you to create more unique hats, in my opinion.

A little while ago I created a YouTube video, "Couture Millinery: How Many Hats and Accessories Can You Make From One Yard of Fabric?"  Check it out and also consider some nontraditional materials to make wonderful, beautiful hats.  Remember that it only takes a fraction of a yard of fabric to make it.  This makes silks, etc., affordable.

Lastly, or did I say that already, learning is your responsibility.  Don't let anything or anyone be a barrier to it.  I spent all day Wednesday learning a new millinery techniques.  If you don't have access to millinery instruction, remember that through observation, you can learn a lot.  Take a sewing class, observe, observe.  For free online millinery books, check out my Pinterest board, Books:  Free Online Millinery and Related Books.  Also my board, "How Other Milliners and Hatters Do It," is a compilation of how other milliners and hatters make there hats, etc.  Although, I may not like some of the techniques, they are there to jump start your and my imagination and thinking.  Again, if you have access to a good instructor, take a few classes.